Transform Your Space with Self-Adhesive Vinyl Wallpaper: A Stylish DIY Solution

Transform Your Space with Self-Adhesive Vinyl Wallpaper: A Stylish DIY Solution

Sino Group is a professional adhesive vinyl film manufacturer and wholesale supplier, kindly get factory price of: graphic cutting vinyl, diy craft vinyl, vinyl transfer tape, self adhesive vinyl film, printing vinyl, adhesive vinyl materials

Share This Post

Step-by-Step Guide to Installing Self-Adhesive Vinyl Wallpaper

Step 1: Prepare the Surface

Ensure that the wall surface is clean, smooth, and free of any dust, dirt, or debris. Use a mild detergent and water to clean the wall if necessary. Allow the wall to dry completely before proceeding.

Step 2: Measure and Cut the Wallpaper

Measure the height and width of the wall and add a few inches to each dimension to allow for adjustments during installation. Using those measurements, cut the self-adhesive vinyl wallpaper into strips, making sure they are slightly longer than the wall’s height.

Step 3: Start with a Corner

Begin in a corner of the room and peel off a small portion of the backing paper from the top of the first wallpaper strip. Align the top of the strip with the top corner of the wall, making sure it is straight and level.

Step 4: Apply the Wallpaper

Slowly peel off the backing paper while gradually pressing the wallpaper against the wall, using a wallpaper smoothing tool or a clean cloth to remove air bubbles and ensure a smooth application. Continue this process, working your way down the wall.

Step 5: Trim Excess Wallpaper

Once you have applied a strip of wallpaper, use a sharp utility knife to trim off the excess at the top and bottom. Make precise cuts along the edges, using a straight edge or ruler as a guide.

Step 6: Match Patterns (if applicable)

If your self-adhesive vinyl wallpaper has a pattern, ensure that each strip is aligned correctly to create a seamless look. Match the patterns carefully, overlapping the edges slightly if needed.

Step 7: Repeat the Process

Continue applying the remaining strips of wallpaper in the same manner, aligning them carefully and smoothing out any air bubbles as you go. Trim the excess wallpaper at the top and bottom of each strip.

Step 8: Finishing Touches

Once you have applied all the strips, use a wallpaper smoothing tool or clean cloth to go over the entire wall, ensuring that all edges are securely adhered and there are no air bubbles or wrinkles.

Step 9: Enjoy Your New Wallpapered Wall

Allow the adhesive to set according to the manufacturer’s instructions. Once fully dried and set, step back and admire your newly transformed space with self-adhesive vinyl wallpaper.

Remember to always follow the specific instructions provided by the manufacturer of your self-adhesive vinyl wallpaper, as the installation process may vary slightly depending on the brand or type of wallpaper you are using.

Exploring Different Patterns and Designs of Self-Adhesive Vinyl Wallpaper

Here are some different patterns and designs of self-adhesive vinyl wallpaper that you can consider:

1. Geometric Patterns

Triangles, hexagons, chevron, and other geometric shapes can add a modern and contemporary touch to your space.

2. Floral Prints

Delicate flowers, bold botanical designs, and nature-inspired patterns can bring a touch of elegance and freshness to your walls.

3. Damask Designs

Damask patterns feature intricate and ornate motifs, often with a vintage or regal feel, perfect for adding a touch of sophistication to your room.

4. Stripes

Classic and timeless, striped self-adhesive vinyl wallpaper can create a sense of visual interest and make your space appear taller or wider depending on the direction of the stripes.

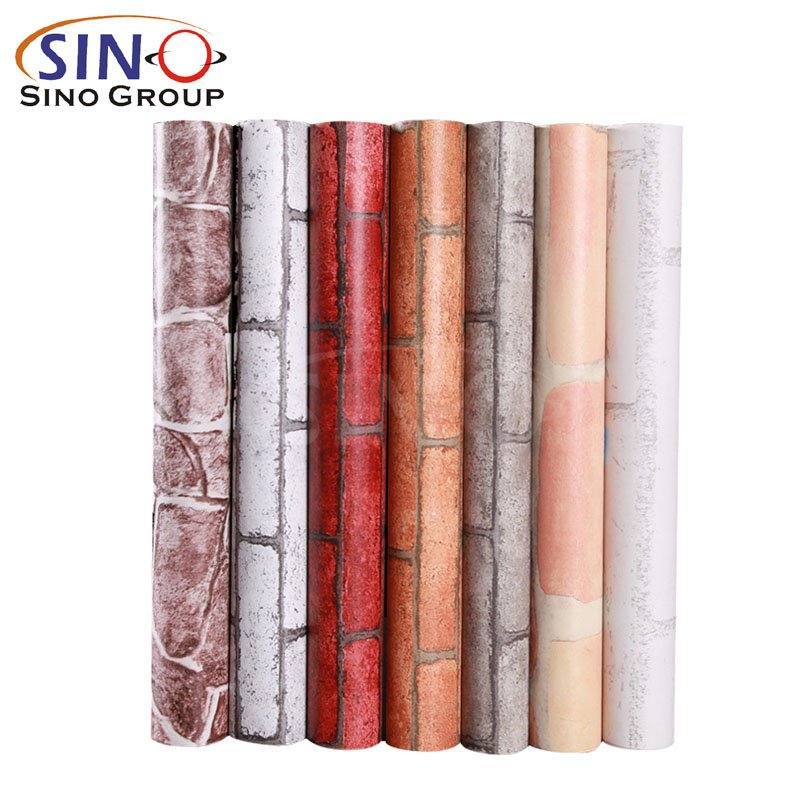
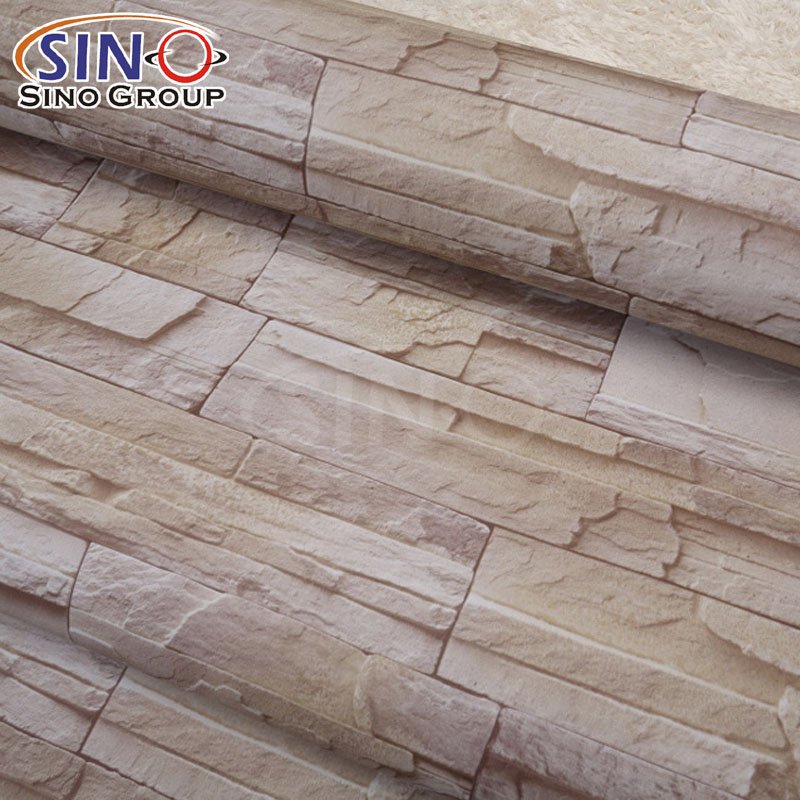
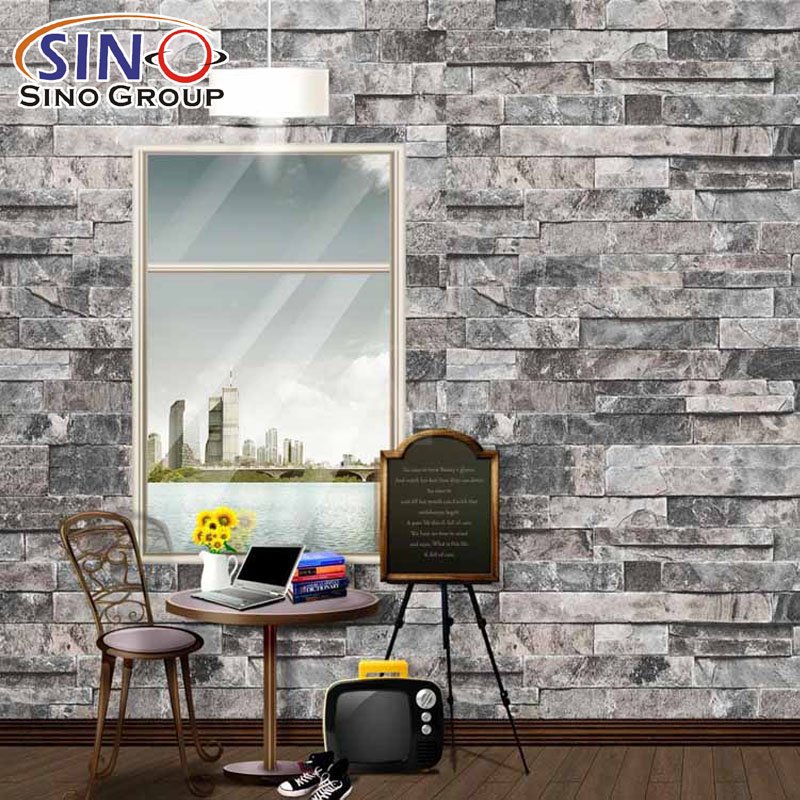
5. Textured Finishes

Some self-adhesive vinyl wallpapers are designed to mimic textures like brick, wood grain, or fabric, providing a realistic and tactile element to your walls.

6. Metallic Accents

Wallpaper with metallic accents or finishes can add a touch of glamour and shine to your space, creating a luxurious and contemporary look.

7. Abstract Designs

Bold, artistic, and abstract patterns can make a statement and add a sense of creativity and visual intrigue to your walls.

8. Tile Effect

Self-adhesive vinyl wallpapers with tile-effect designs can give your space a tiled look without the hassle of actual tiles, offering a cost-effective and easy alternative.

9. Children’s Themes

Self-adhesive vinyl wallpapers are available in various playful and colorful designs featuring popular characters, animals, or themes, perfect for creating a fun and imaginative space for kids.

10. Faux Marble or Stone

These designs imitate the appearance of marble or natural stone, providing an elegant and luxurious touch to your walls.

Remember to consider your overall decor style, the purpose of the room, and your personal preferences when choosing a pattern or design for your self-adhesive vinyl wallpaper.

Cleaning and Maintenance Tips for Self-Adhesive Vinyl Wallpaper

1. Regular Dusting

Use a soft, dry cloth or a feather duster to gently remove dust from the surface of the wallpaper. Regular dusting prevents the buildup of dirt and keeps the wallpaper looking fresh.

2. Spot Cleaning

In case of spills or stains, it’s important to act quickly. Use a mild detergent mixed with warm water and a soft cloth to gently dab the stained area. Avoid scrubbing vigorously, as it may damage the wallpaper. Test the cleaning solution on a small, inconspicuous area first to ensure it doesn’t cause any discoloration.

3. Avoid Harsh Chemicals

When cleaning self-adhesive vinyl wallpaper, avoid using harsh chemicals, abrasive cleaners, or solvents as they can damage the surface. Stick to mild, non-abrasive cleaning solutions and gentle cleaning techniques.

4. Do Not Soak or Overly Wet

Excessive moisture can weaken the adhesive and cause the wallpaper to peel or bubble. Avoid soaking the wallpaper or using excessive water when cleaning. Instead, lightly dampen a cloth with the cleaning solution and gently wipe the surface.

5. Prevent Scratches

While self-adhesive vinyl wallpaper is durable, it is still susceptible to scratches. Avoid using sharp or abrasive objects when cleaning or handling the wallpaper. Be mindful of jewelry, keys, or any rough surfaces that may come into contact with the wallpaper.

6. Test Cleaning Products

Before using any cleaning product or solution on the wallpaper, it’s essential to test it in an inconspicuous area first. Apply a small amount of the cleaner and check for any adverse reactions, such as discoloration or damage.

7. Avoid Excessive Heat or Sunlight

Prolonged exposure to direct sunlight or excessive heat can cause the colors of the wallpaper to fade or the adhesive to weaken. Keep the wallpaper away from heat sources such as radiators or stovetops, and use curtains or blinds to block direct sunlight if necessary.

8. Repairing Damaged Areas

If any portion of the wallpaper becomes damaged or starts to peel, it’s best to address it promptly. Carefully remove the damaged section and replace it with a new piece of self-adhesive vinyl wallpaper. Ensure that the replacement matches the existing pattern and design.

By following these cleaning and maintenance tips, you can keep your self-adhesive vinyl wallpaper looking vibrant and in great condition for a long time.

Final Words

In conclusion, self-adhesive vinyl wallpaper offers a stylish and practical DIY solution for transforming your space with ease. Its versatility, affordability, and ease of installation make it an excellent choice for homeowners and renters alike. Whether you want to add a pop of color, create a focal point, or completely revamp your walls, self-adhesive vinyl wallpaper provides endless possibilities. By following the cleaning and maintenance tips mentioned above, you can ensure that your wallpaper remains in pristine condition for years to come. Embrace your creativity, unleash your personal style, and embark on a home decor journey that will leave you delighted with the stunning results. With self-adhesive vinyl wallpaper, your space will undergo a remarkable makeover that reflects your unique taste and elevates the ambiance of every room. Get ready to enjoy a home that is truly your own, where every wall tells a story of style, creativity, and self-expression.

Professional Adhesive Vinyl Material Supplier

  1. Leading manufacturer in China
  2. 10+ years experience produced adhesive vinyls
  3. Over 30+ series and 500+ colors
  4. Free sample swatches supply
  5. Flexible OEM & ODM design
  6. Quality control and stability
  7. Reasonable price and fast delivery
  8. Premium customer service

Our Happy Customer

what our clients have to say

Please Leave Your Information

We would be happy to hear you and learn all about you.

*We respect your confidentiality and all information is protected.

Graphic Cutting Vinyl FAQ

The normal size is 12×12″/ 30.5×30.5CM, 12×60″/30.5x152CM, 0.61x50M/24″x163FT, 1.22x50M/60″x163FT, we can make customize size and brand.

The  SINOVINYL® graphic cutting vinyl with 6 advantages:
1. Removable:

When you stick on the wall, glass or any other smooth surface, you can remove it any time, and without the glue leave on the surface.

2. Friendly materials:

The SINOVINYL® graphic cutting vinyl raw material made by PVC and solvent glue, no smell, no formaldehyde.

3. Long durability:

Use for outdoor 2-3 years, for indoor up to 5 years.

4. Easy to application:

SINOVINYL® graphic cutting vinyl is easy for cricut vinyl cutter plotter, easy to cut and application on the wall, glass or any other smooth surface.

5. Multi colors:

With more than 100+ colors, super gloss and super matte surface.

6. Versatile widely use:

SINOVINYL® graphic cutting vinyl can be use for vinyl cutting plotter, letters and patterns cutting, outdoor and indoor graphic poster sign, wall and glass decoration, home decor, furniture, car decal sticker etc.

Commonly used are drug labels, food labels, shampoo labels, barcodes, battery labels, outer box labels, product labels, semi-finished products labels, temporary labels, home wall decoration labels, wall stickers, furniture labels Stickers, advertising decoration labels, computer lettering labels, outdoor decoration labels, packaging equipment labels, etc.

Film stickers are mainly used for decorative decals on cars and motorcycles, logo characters on shopping malls, reflective films on highways, and markings on containers.

The common signs at the entrance of stores, road signs, and advertisements posted on the street in our lives are all instant stickers, which are characterized by their own adhesive on the back, which can be pasted or used with transfer film after uncovering the back paper.

The transfer film is an intermediate carrier that carries the printed or printed pattern. After the lettering is made, a layer of transfer film will be attached. A layer of chemical elastic film transferred to the printed article is used. Simple In other words, tear off the backing paper and transfer the pattern with transfer film to something, such as a glass door, and then tear off the transfer film to make the cutting vinyl neat and standard in the glass door, and the pattern will never be crooked or twisted. Unfair imagination.

How to correct use of vinyl transfer film:

1. Before starting to paste, please prepare some tools: scissors, knives, cards or bank cards. At first cut the excess vacancies around the pattern with scissors, so that you can compare and paste them.

2. Stick the transfer film on the pattern, and use a card or bank card to repeatedly scrape the transfer film back and forth to make the pattern and the transfer film stick together better, and there will be no bubbles after sticking to the wall;

3. If the wall powder falls off or the transfer film will be stuck together with the wall paint when the transfer film is torn off, please fix it before applying the wall sticker; peel off the transfer film with the pattern slightly from the bottom paper of the pattern, if the pattern has the center that is not stuck to the transfer film can be assisted with a knife. Before proceeding to step 4, first filter the leftover material cut from the transfer film to the wall of the corner to test the function of the wall, and then paste it after making sure that the wall is ok. When attaching a pattern with a large contrast area, the pattern can be reversed, and the bottom paper of the pattern can be peeled away from the transfer film and the pattern;

4. When you paste the pattern, you can first glue a corner of the transfer film to the wall, paste it on the selected position, and use a scratch card to smooth out the air bubbles between the wall sticker and the wall;

5. When tearing the transfer film away from the wall, try to be as slow as possible. You can tear off the transfer film while pressing the pattern, and definitely don’t tear off the pattern together.

How to use the vinyl transfer tape?

1. Why we need to choose the good quality cricut cutting diy craft vinyl of the release paper?

We use the cricut vinyl cutter plotter, the backing bood one side is with glue, we need to choose the release paper, avoid sticking to the pad.

How to choose the good quality self adhesive DIY craft vinyl on cricut plotter machine?


On the market has 3 types of the release paper,  PET release paper, double PE release paper, normal release paper.

Double PE release paper is similar as PET release paper, now we show you the difference of the Double PE and normal.

How to choose the good quality self adhesive DIY craft vinyl on cricut plotter machine?

So we need to choose the Double PE coating release paper cricut cutting diy craft vinyl.


2. How to differentiate the cricut cutting diy craft vinyl double PE coating release paper and the normal?

The Double PE coating release paper it feels smooth when touched by hand and shiny under light.
How to choose the good quality self adhesive DIY craft vinyl on cricut plotter machine?


3. How to choose the good quality of the cricut cutting diy craft vinyl?

To test with pure color pvc vinyl, you can stretch the cricut cutting vinyl by hand. Good quality vinyl has a certain degree of stretchability(the left of the picture). If it can easily break or become white after stretching, the quality of vinyl is not good(the right of the picture).


Now we know how to choose the right quality of the cricut diy craft cutting vinyl.

The price for diy craft vinyl is based on the vinyl types, for our diy craft vinyl items, the size 12×60″/0.305×1.52m, the price is from US2-US6 per roll.

Please contact us to get detaile offers.

How to use graphic cutting vinyl?

Computer designed images are loaded onto the vinyl cutter via cords or over wifi depending on the model. Then the vinyl is loaded into the machine where it is automatically fed through and cut to follow the set design.

The vinyl cutter uses a small knife to precisely cut the outline of figures into a sheet or piece of vinyl, but not the release liner. The knife moves side to side and turns, while the vinyl is moved beneath the knife. The results from the cut process is an image cut into the material.

  1. The material is then ‘weeded’ where the excess parts of the figures are removed from the release liner. It is possible to remove the positive parts, which would give a negative sticker, or remove the negative parts, giving a positive sticker. Removing the figure would be like removing the positive, giving a negative image of the figures.

A sheet of transfer tape with an adhesive backing is laid on the weeded vinyl. A roller is applied to the tape, causing it to adhere to the vinyl. The transfer tape and the weeded vinyl is pulled off the release liner, and applied to a substrate, such as a sheet of aluminium. This results in an aluminium sign with vinyl figures.

Get Started With SINOVINYL Now

Welcome to get adhesive vinyl materials offer and to be the distributor of SINOVINYL.

small_c_popup-1-1.png

Ask for Sample Now

small_c_popup-1.png

Ask for Quote Now

We Would Be Happy To Assist You

small_c_popup.png

Download Our Full Catalog

We Would Be Happy To Assist You