
DIY Wall Art: Creating Custom Designs with Self-Adhesive Vinyl Film Rolls
1. Geometric Shapes
Cut out various geometric shapes from different colored vinyl film rolls and arrange them on your wall to create a modern and abstract design.
2. Inspirational Quotes
Use self-adhesive vinyl film rolls to create stencils of your favorite quotes or affirmations. Apply them to your wall and paint over them to create a unique and personalized wall art piece.
3. Nature Silhouettes
Cut out silhouettes of trees, animals, or flowers from vinyl film rolls. Stick them onto your wall to create a nature-inspired wall art design.
4. Custom Wall Decals
Design and cut out your own custom decals using self-adhesive vinyl film rolls. You can create anything from monograms and initials to intricate patterns and designs.
5. Abstract Paintings
Apply different colored vinyl film rolls onto a canvas or wooden board, overlapping them to create a textured and colorful background. Then, use acrylic paint to create abstract designs on top.
6. Pixel Art
Cut small squares or rectangles from vinyl film rolls of different colors and arrange them on your wall to create pixelated images or patterns.
7. Pop Art Portraits
Print or draw a portrait of your favorite celebrity or icon. Use vinyl film rolls to cut out bold and vibrant shapes to overlay on the portrait, creating a pop art effect.
8. City Skylines
Cut out the silhouette of a city skyline from vinyl film rolls and stick it onto your wall. Add small details like windows or lights using different colored vinyl film rolls.
9. Botanical Wall Decor
Create a gallery wall of botanical-themed art using vinyl film rolls. Cut out leaves, flowers, and branches, and arrange them in frames or directly on the wall.
10. Vinyl Wall Murals
Design and create your own custom wall mural using self-adhesive vinyl film rolls. Whether it’s a scenic landscape, abstract design, or intricate pattern, the possibilities are endless.
Remember, these are just a few ideas to get you started. Feel free to mix and match techniques or come up with your own unique designs using self-adhesive vinyl film rolls. Let your creativity flow!
Step-by-Step Guide to Applying Self-Adhesive Vinyl Film Rolls on Walls
Step 1: Gather your materials
Collect all the necessary materials for the project, including self-adhesive vinyl film rolls, measuring tape, scissors or a utility knife, a squeegee or credit card, and a level.
Step 2: Prepare the wall
Ensure that the wall surface is clean, smooth, and free from dust or debris. Remove any existing wallpaper or loose paint. Repair any damages or imperfections on the wall.
Step 3: Measure and cut
Measure the height and width of the wall you want to cover with the vinyl film roll. Add a few inches to each measurement to account for trimming and adjustments. Using the measurements, cut the vinyl film roll accordingly.
Step 4: Start at one corner
Peel off a small section of the backing paper from the vinyl film roll. Align the exposed edge with one corner of the wall, ensuring it is level. Press the exposed section firmly onto the wall.
Step 5: Apply the vinyl film roll
Slowly peel off the backing paper while smoothing the vinyl film roll onto the wall. Use a squeegee or credit card to eliminate air bubbles and ensure a smooth application. Work from one side to the other, gradually peeling and smoothing the film.
Step 6: Trim the excess
Once the entire vinyl film roll is applied to the wall, use scissors or a utility knife to trim the excess material along the edges and corners. Take your time and make precise cuts for a clean finish.
Step 7: Repeat for additional rolls
If your wall requires more than one vinyl film roll, repeat steps 4 to 6 for each additional roll. Take care to align the patterns or designs seamlessly between the rolls.
Step 8: Finishing touches
Inspect the entire wall to ensure the vinyl film is securely applied without any air bubbles or loose edges. Gently press down any areas that may need additional adhesion.
Step 9: Enjoy your new wall decor
Stand back and admire your beautifully transformed wall. Take a moment to appreciate the new look you’ve achieved with self-adhesive vinyl film rolls.
Remember to consult the specific instructions provided by the manufacturer of the vinyl film rolls you are using, as application techniques may vary.

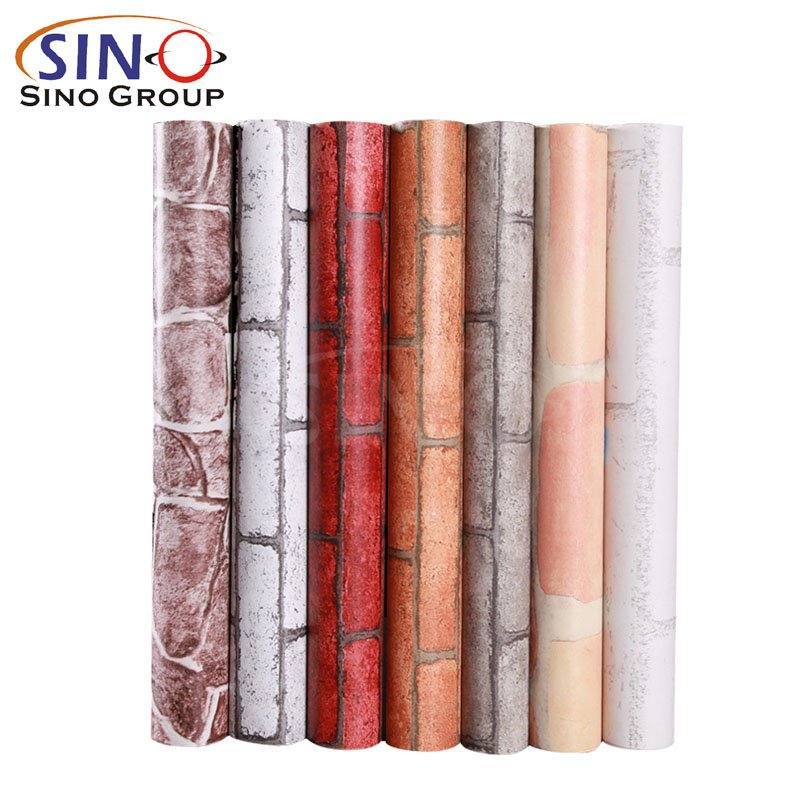
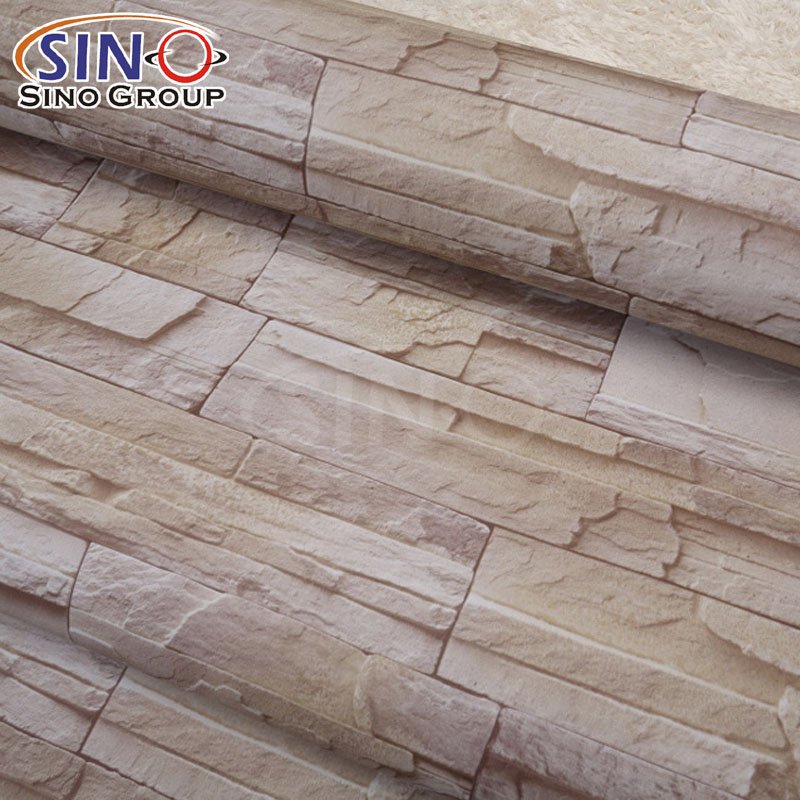
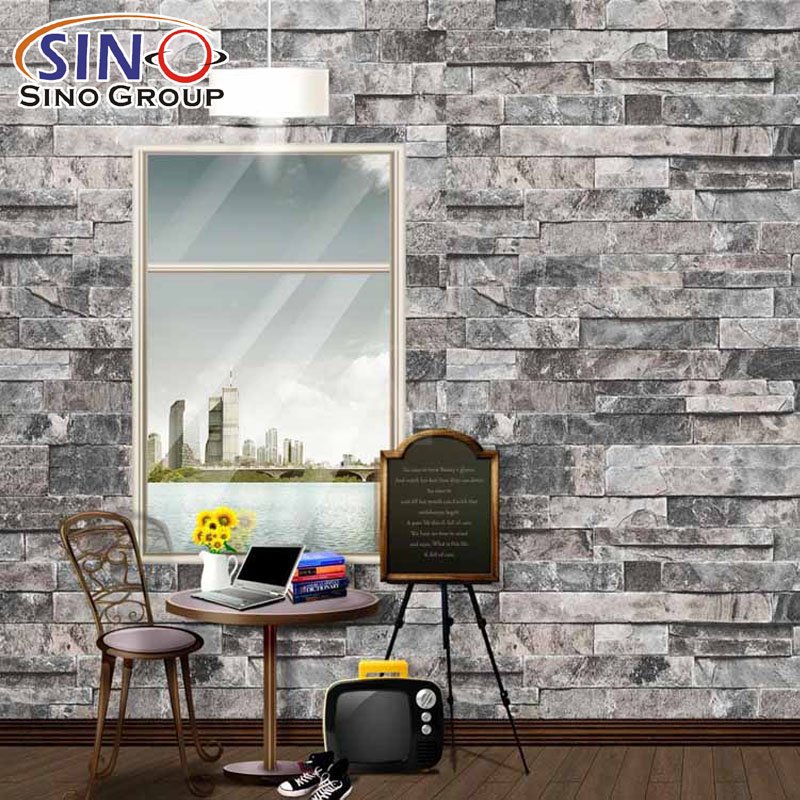
Repairing Damaged Walls with Self-Adhesive Vinyl Film Rolls: A Simple Solution
Self-adhesive vinyl film rolls can be a practical solution for repairing damaged walls. Here’s how they can help:
1. Concealing Wall Imperfections
Self-adhesive vinyl film rolls have the ability to cover up various types of wall imperfections such as cracks, dents, or holes. By applying the film over the damaged areas, you can effectively hide these flaws and achieve a smooth, uniform surface.
2. Easy Application
Self-adhesive vinyl film rolls are designed for easy installation. They come with an adhesive backing that allows you to simply peel off the backing paper and stick the film directly onto the wall. This means you don’t have to engage in complex repair work or hire professionals to fix the damaged areas.
3. Time and Cost Savings
Repairing damaged walls traditionally can be time-consuming and expensive. It often involves patching, sanding, and repainting, which requires multiple steps and materials. With self-adhesive vinyl film rolls, you can skip these labor-intensive processes, saving both time and money.
4. Versatile Design Options
Self-adhesive vinyl film rolls come in a wide range of designs, patterns, and colors. This allows you to choose a film that not only covers the damaged areas but also complements your existing décor. Whether you prefer a subtle texture, a vibrant pattern, or a solid color, there are numerous options available to suit your aesthetic preferences.
5. Temporary or Permanent Solution
Depending on your needs, self-adhesive vinyl film rolls can serve as a temporary or permanent solution for repairing damaged walls. If you’re in a rental space or simply want to experiment with different designs, you can apply the film temporarily and remove it without causing any damage to the underlying wall surface. On the other hand, if you’re looking for a long-term solution, the film can be applied more securely for a lasting repair.
It’s important to note that while self-adhesive vinyl film rolls can effectively conceal minor wall damages, they may not be suitable for severe structural issues. In such cases, it’s advisable to consult a professional to assess and address the extent of the damage.
(Click the picture to learn more)
Final Words
In conclusion, self-adhesive vinyl film rolls offer an incredible opportunity to transform your living space and achieve the look you desire for stunning wall decor. With their versatility, easy application, and ability to conceal wall imperfections, these rolls provide a practical and cost-effective solution for enhancing your walls. Whether you want to add a touch of personalization, cover up minor damages, or experiment with different patterns and colors, self-adhesive vinyl film rolls offer endless possibilities. So, unleash your creativity, explore the wide range of options available, and embark on a journey to create a visually captivating and inspiring environment that truly reflects your style and taste. Say goodbye to dull walls and embrace the beauty and convenience of self-adhesive vinyl film rolls for a stunning wall decor transformation like never before.


