Some Tips for Seamless Vinyl Sticker Installation
Installing vinyl stickers seamlessly requires attention to detail and patience. Here are some tips to help you achieve a smooth and professional-looking installation:
1. Clean the Surface
Before applying the vinyl sticker, make sure the surface is clean and free from dust, dirt, oils, and debris. Use a mild cleaning solution or rubbing alcohol to ensure a clean and dry surface.
2. Measure and Position
Use a ruler, tape measure, or masking tape to mark the desired placement of the sticker. This helps ensure the sticker is applied straight and centered.
3. Use the Hinge Method
For larger stickers, use the hinge method. Place a piece of masking tape along the top edge of the sticker, leaving half of the tape on the sticker and half on the surface. This acts as a hinge, allowing you to position the sticker accurately before fully adhering it.
4. Peel the Backing Gradually
Peel a small portion of the backing paper away from the sticker. Be careful not to touch the adhesive with your fingers. This prevents fingerprints and dirt from affecting the adhesive quality.
5. Apply in Sections
If the sticker is large, consider applying it in sections. Start with one edge, smooth it down with a credit card or squeegee, then gradually peel away the backing while pressing down with the tool.
6. Squeegee Smoothly
Use a squeegee or credit card to gently press down the sticker from the center outward, working out any air bubbles as you go. Applying even pressure helps the adhesive bond effectively.
7. Remove Air Bubbles
If you notice air bubbles forming, gently lift the sticker and reapply that section. If stubborn bubbles remain, use a pin or needle to carefully puncture the bubble and then press the air out.
8. Slow and Steady
Take your time while applying the sticker. Rushing can lead to misalignment or trapped air bubbles. Slow, deliberate movements ensure a neat and accurate installation.
9. Peel Backing at a Sharp Angle
When peeling the backing away, do so at a sharp angle, almost parallel to the surface. This prevents the sticker from sticking prematurely and allows you to adjust its position if necessary.
10. Avoid Extreme Temperatures
If possible, avoid installing vinyl stickers in extreme temperatures, whether too hot or too cold. Moderate temperatures provide the best conditions for proper adhesion.
11. Double-Check Alignment
Before fully adhering the sticker, step back and double-check its alignment and placement. Once the adhesive makes contact, it’s challenging to reposition the sticker without damaging it.
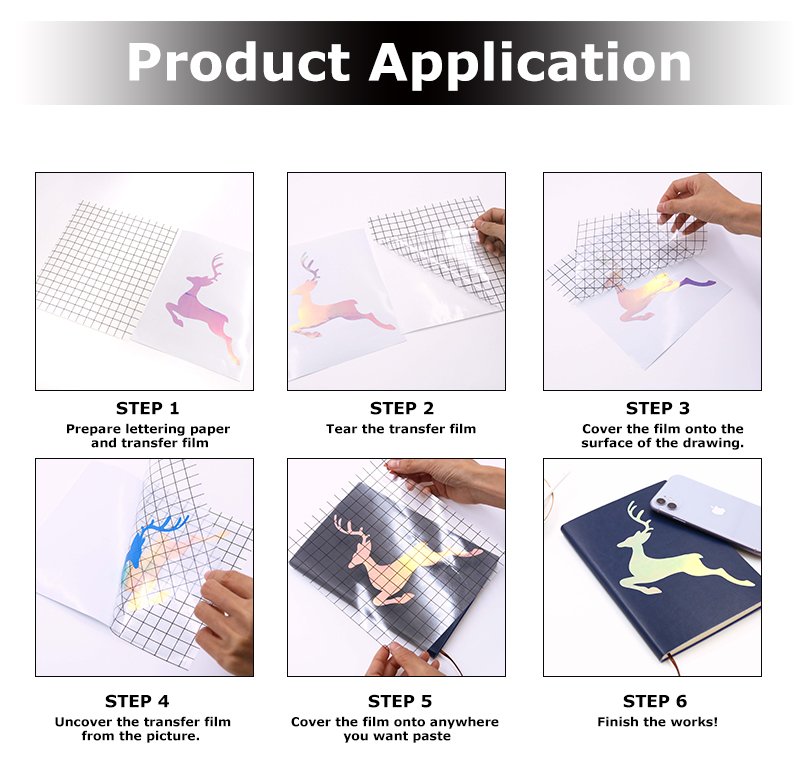
12. Remove Transfer Tape Carefully
If your sticker comes with transfer tape, peel it off slowly and at a sharp angle. This helps the vinyl adhere to the surface while preventing the sticker from lifting.
13. Press Edges Securely
After the sticker is in place, go over the edges again with the squeegee to ensure all parts are securely adhered. Pay special attention to corners and curves.
14. Allow Proper Curing Time
After installation, let the sticker sit undisturbed for a while. This allows the adhesive to bond properly before subjecting it to any potential stress or exposure.
Remember, practice makes perfect. If you’re new to installing vinyl stickers, consider practicing on a small surface before applying them to more prominent areas. With patience and attention to detail, you’ll be able to achieve a seamless and professional-looking installation.


